Levitation Photography
More Than Meets the Eye
When I was a kid, I spent countless hours practicing sleight of hand and learning the secrets of close-up magic. There was something deeply addictive about that moment of realization on a friend's face. That split second where their brain couldn't quite process what their eyes were seeing. Providing that sense of wonder and pure amazement became a bit of an obsession for me.
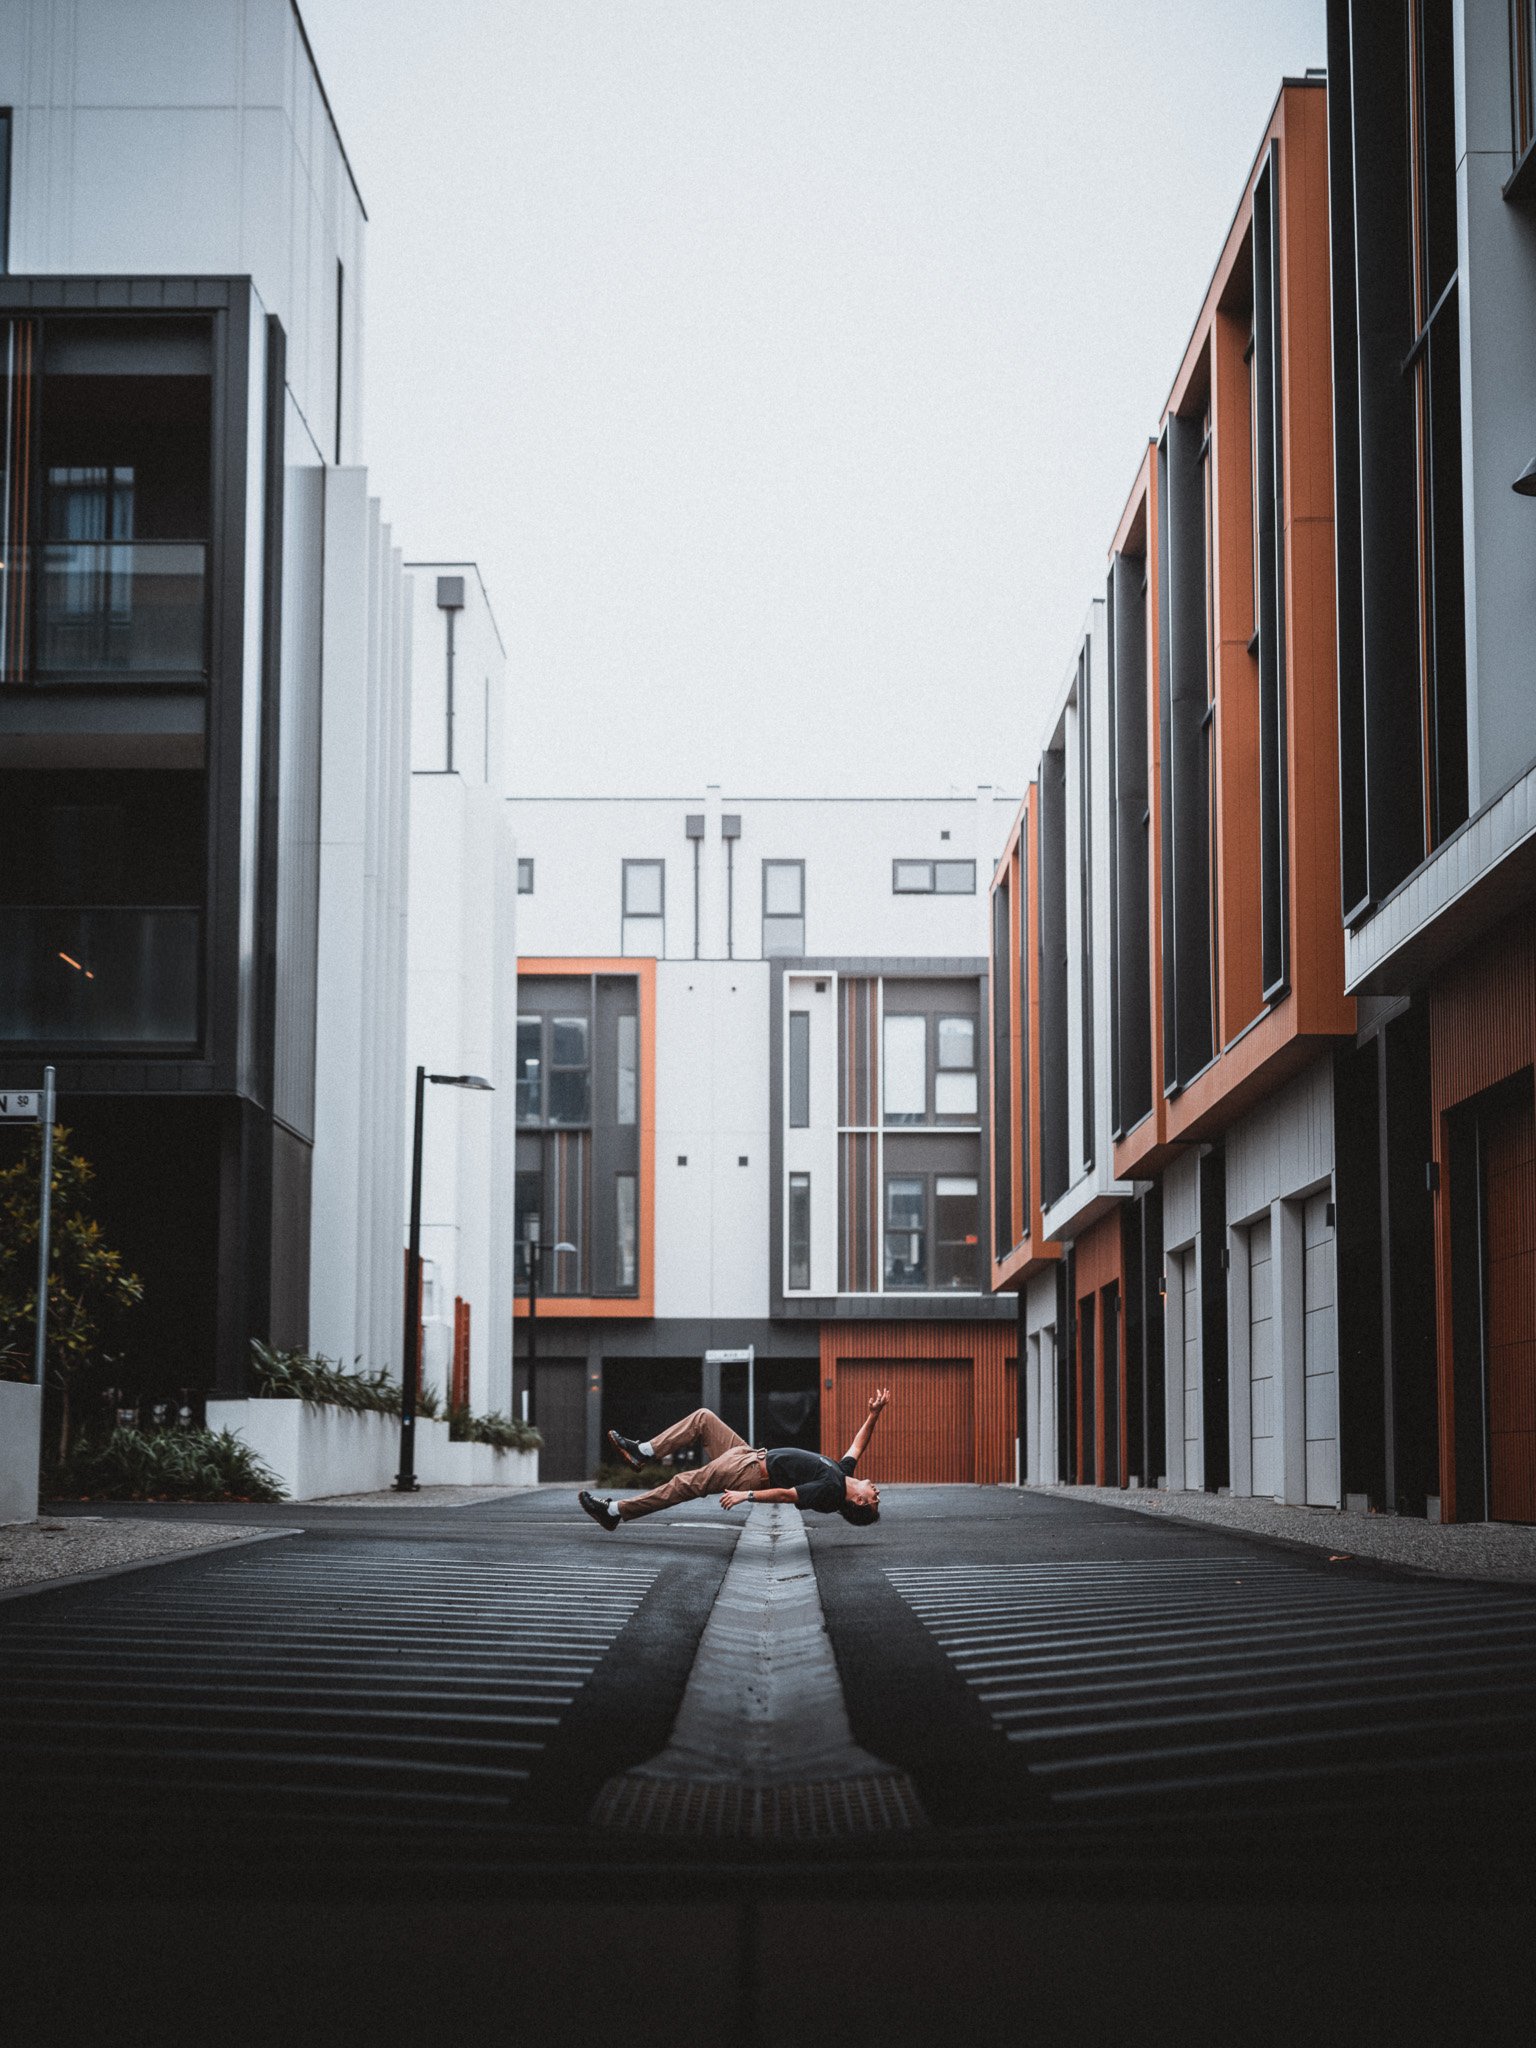
As I moved into photography, I realized I didn't have to leave that feeling behind. Levitation photography is the modern-day equivalent of a "levitating card" trick.
It allows us to defy gravity and create a visual narrative that feels impossible, yet looks entirely real. It’s about recapturing that childhood magic through a lens.
The Foundation: Compositing
The core of this technique is a process called compositing. You aren't capturing one "lucky" shot; you are capturing two or more specific layers that will be blended together during post-processing. To do this successfully, your camera must remain on a tripod. Any shift in the frame, even by a millimetre, will make the final edit much more difficult.
Position your subject
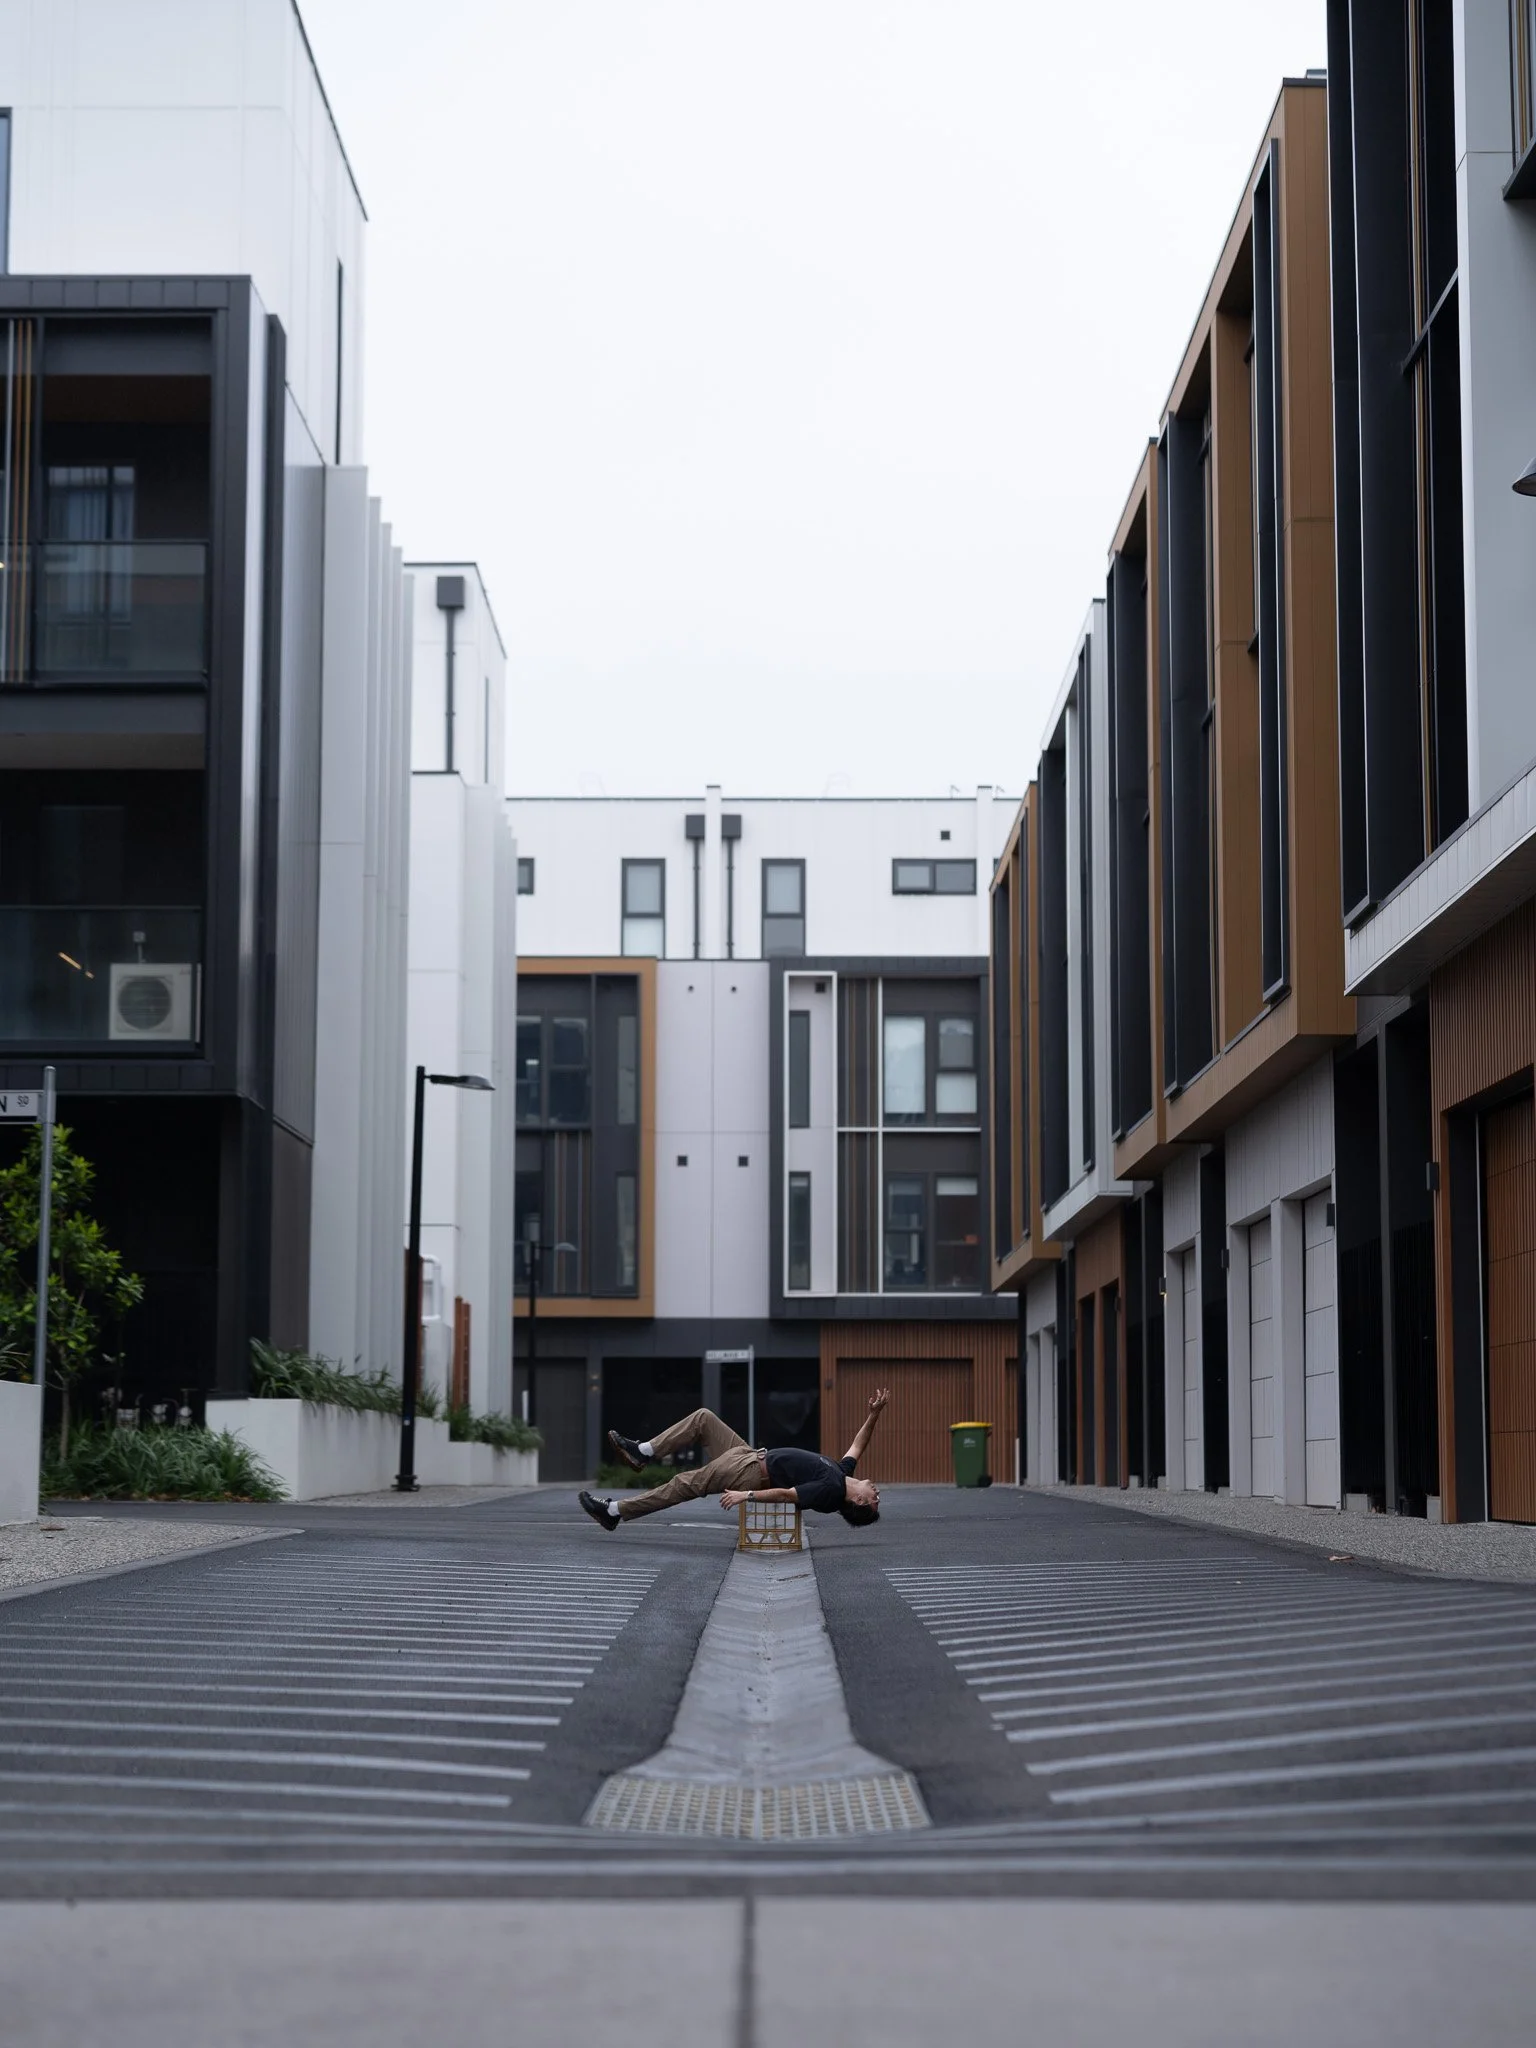
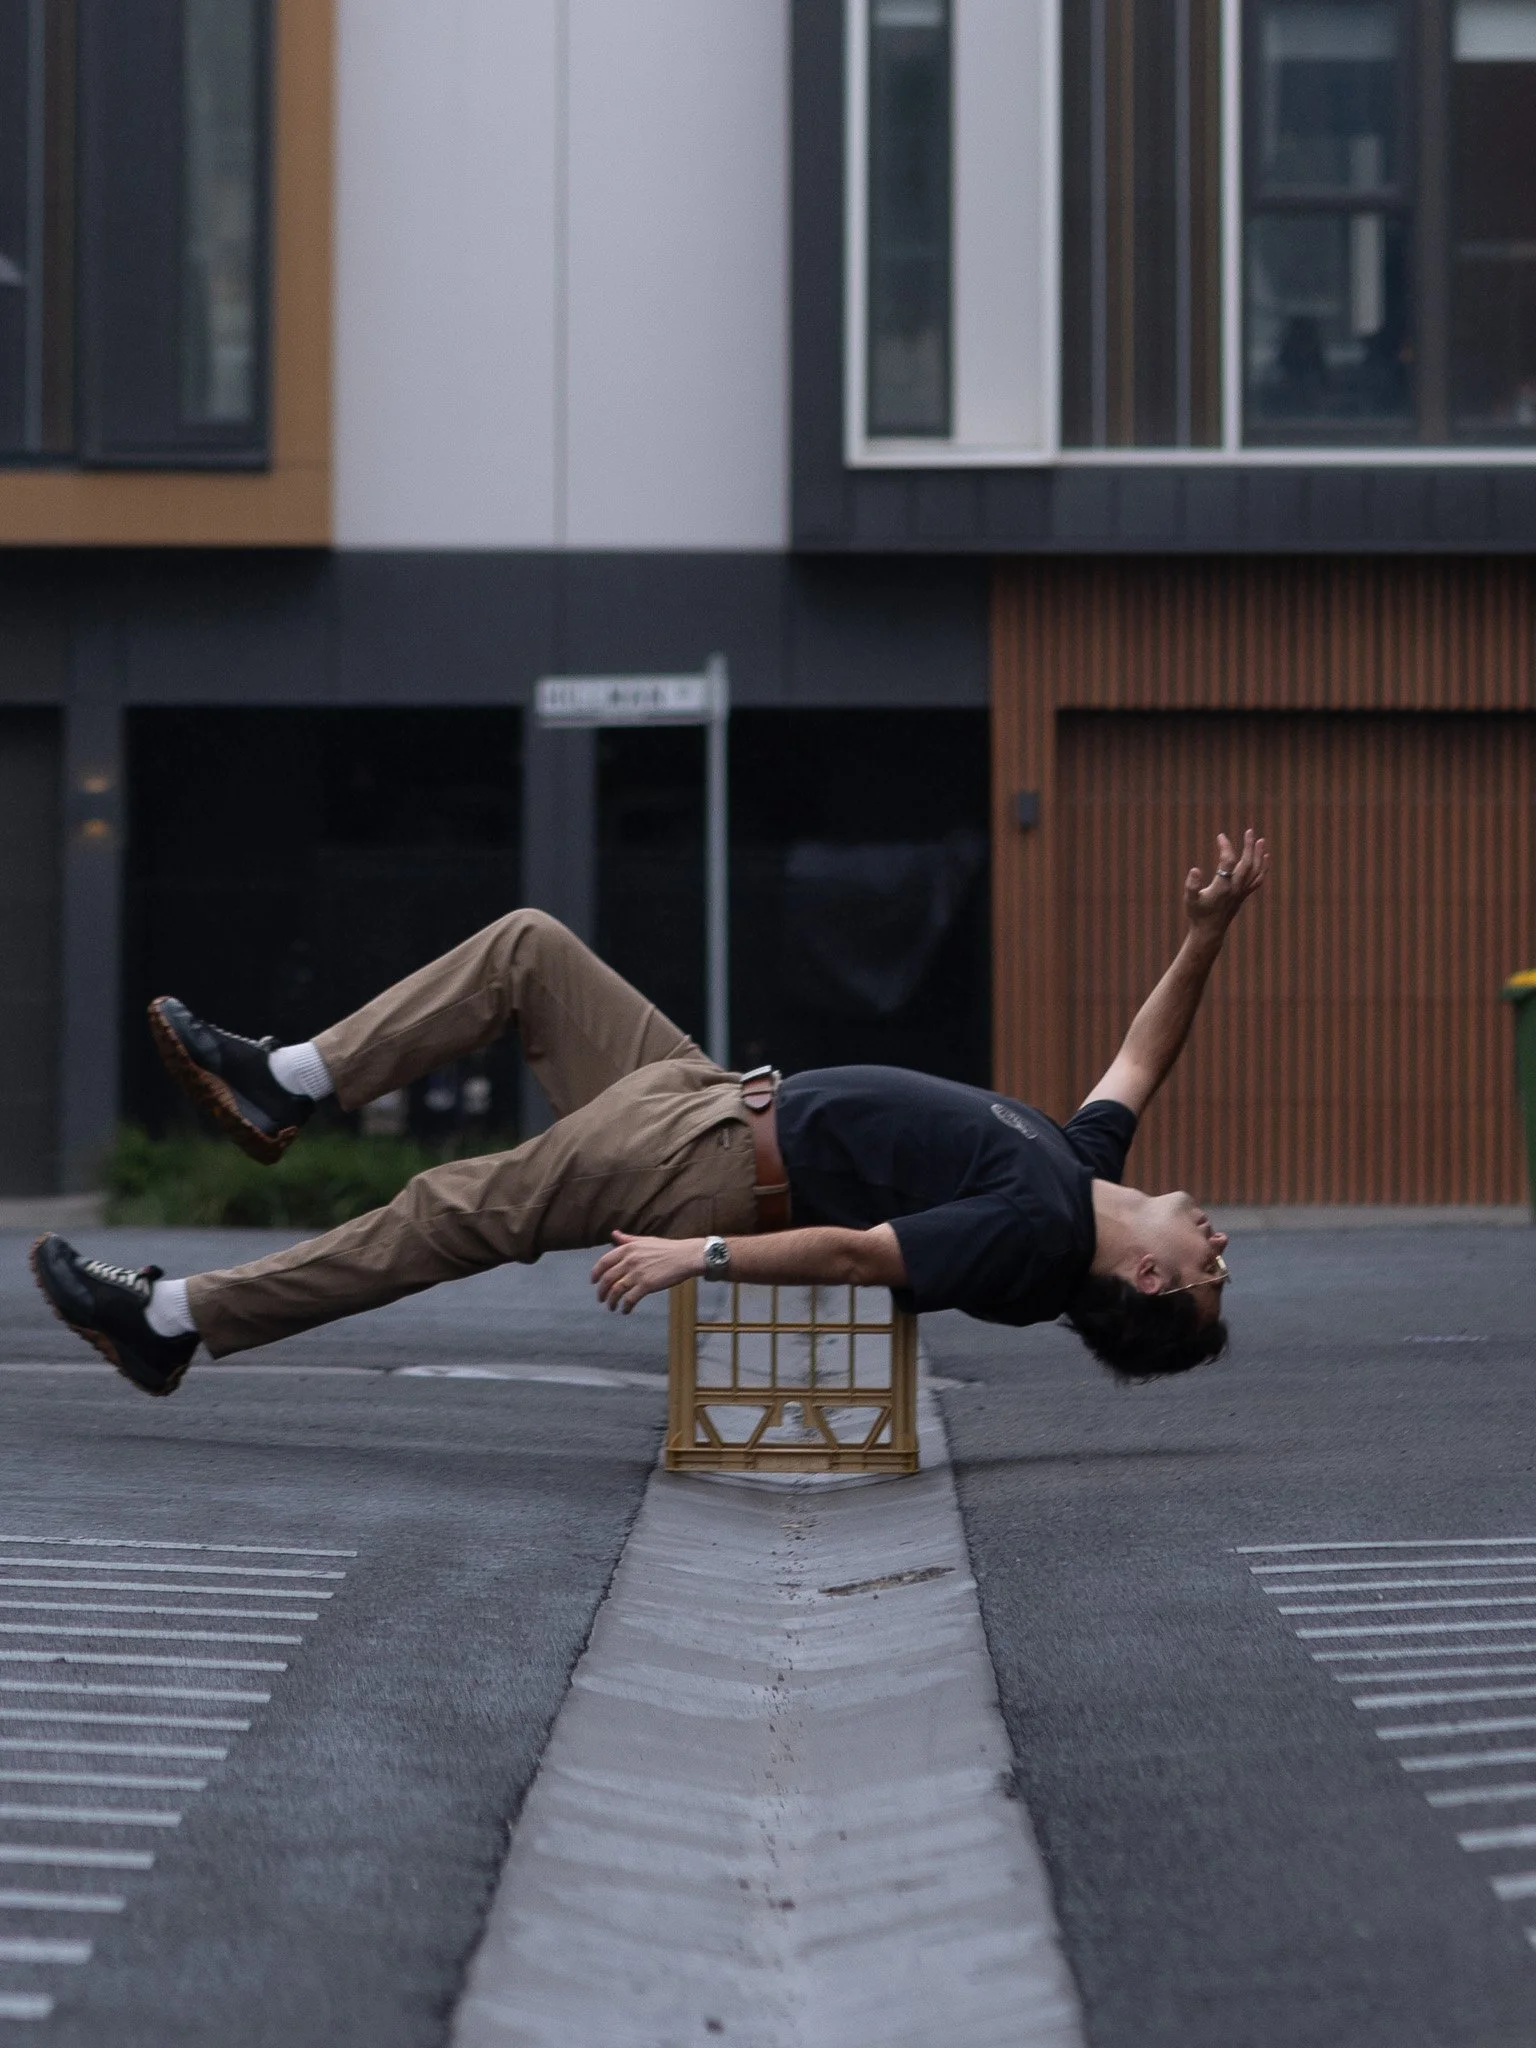
To create the illusion of flight, you need to support your subject's weight. For this demonstration, we used a standard milk crate. It is a practical choice because it’s rigid enough to hold a person’s weight but small enough to be easily "masked" out later.
The goal is to find a balance point that allows the subject to look comfortable. If they look like they are straining, the "weightless" effect will be ruined.
Pro tip:
Ensure you set your camera to Manual, setting your aperture, ISO, Shutter speed and White balance.
You will also want to ensure your lens is set to manual focus, as the focal plane will need to remain the exact same between the two images we will be capturing.
Managing Contact Points
Pay close attention to where the subject’s body meets the crate.
Clothing:
Let fabric hang over the edges of the crate to simulate gravity acting on the clothes, but ensure the crate itself isn't pinching the fabric into unnatural shapes.Limbs:
Encourage the subject to extend their arms and legs. Having limbs away from the support object makes the eventual removal of the crate much cleaner in Photoshop.
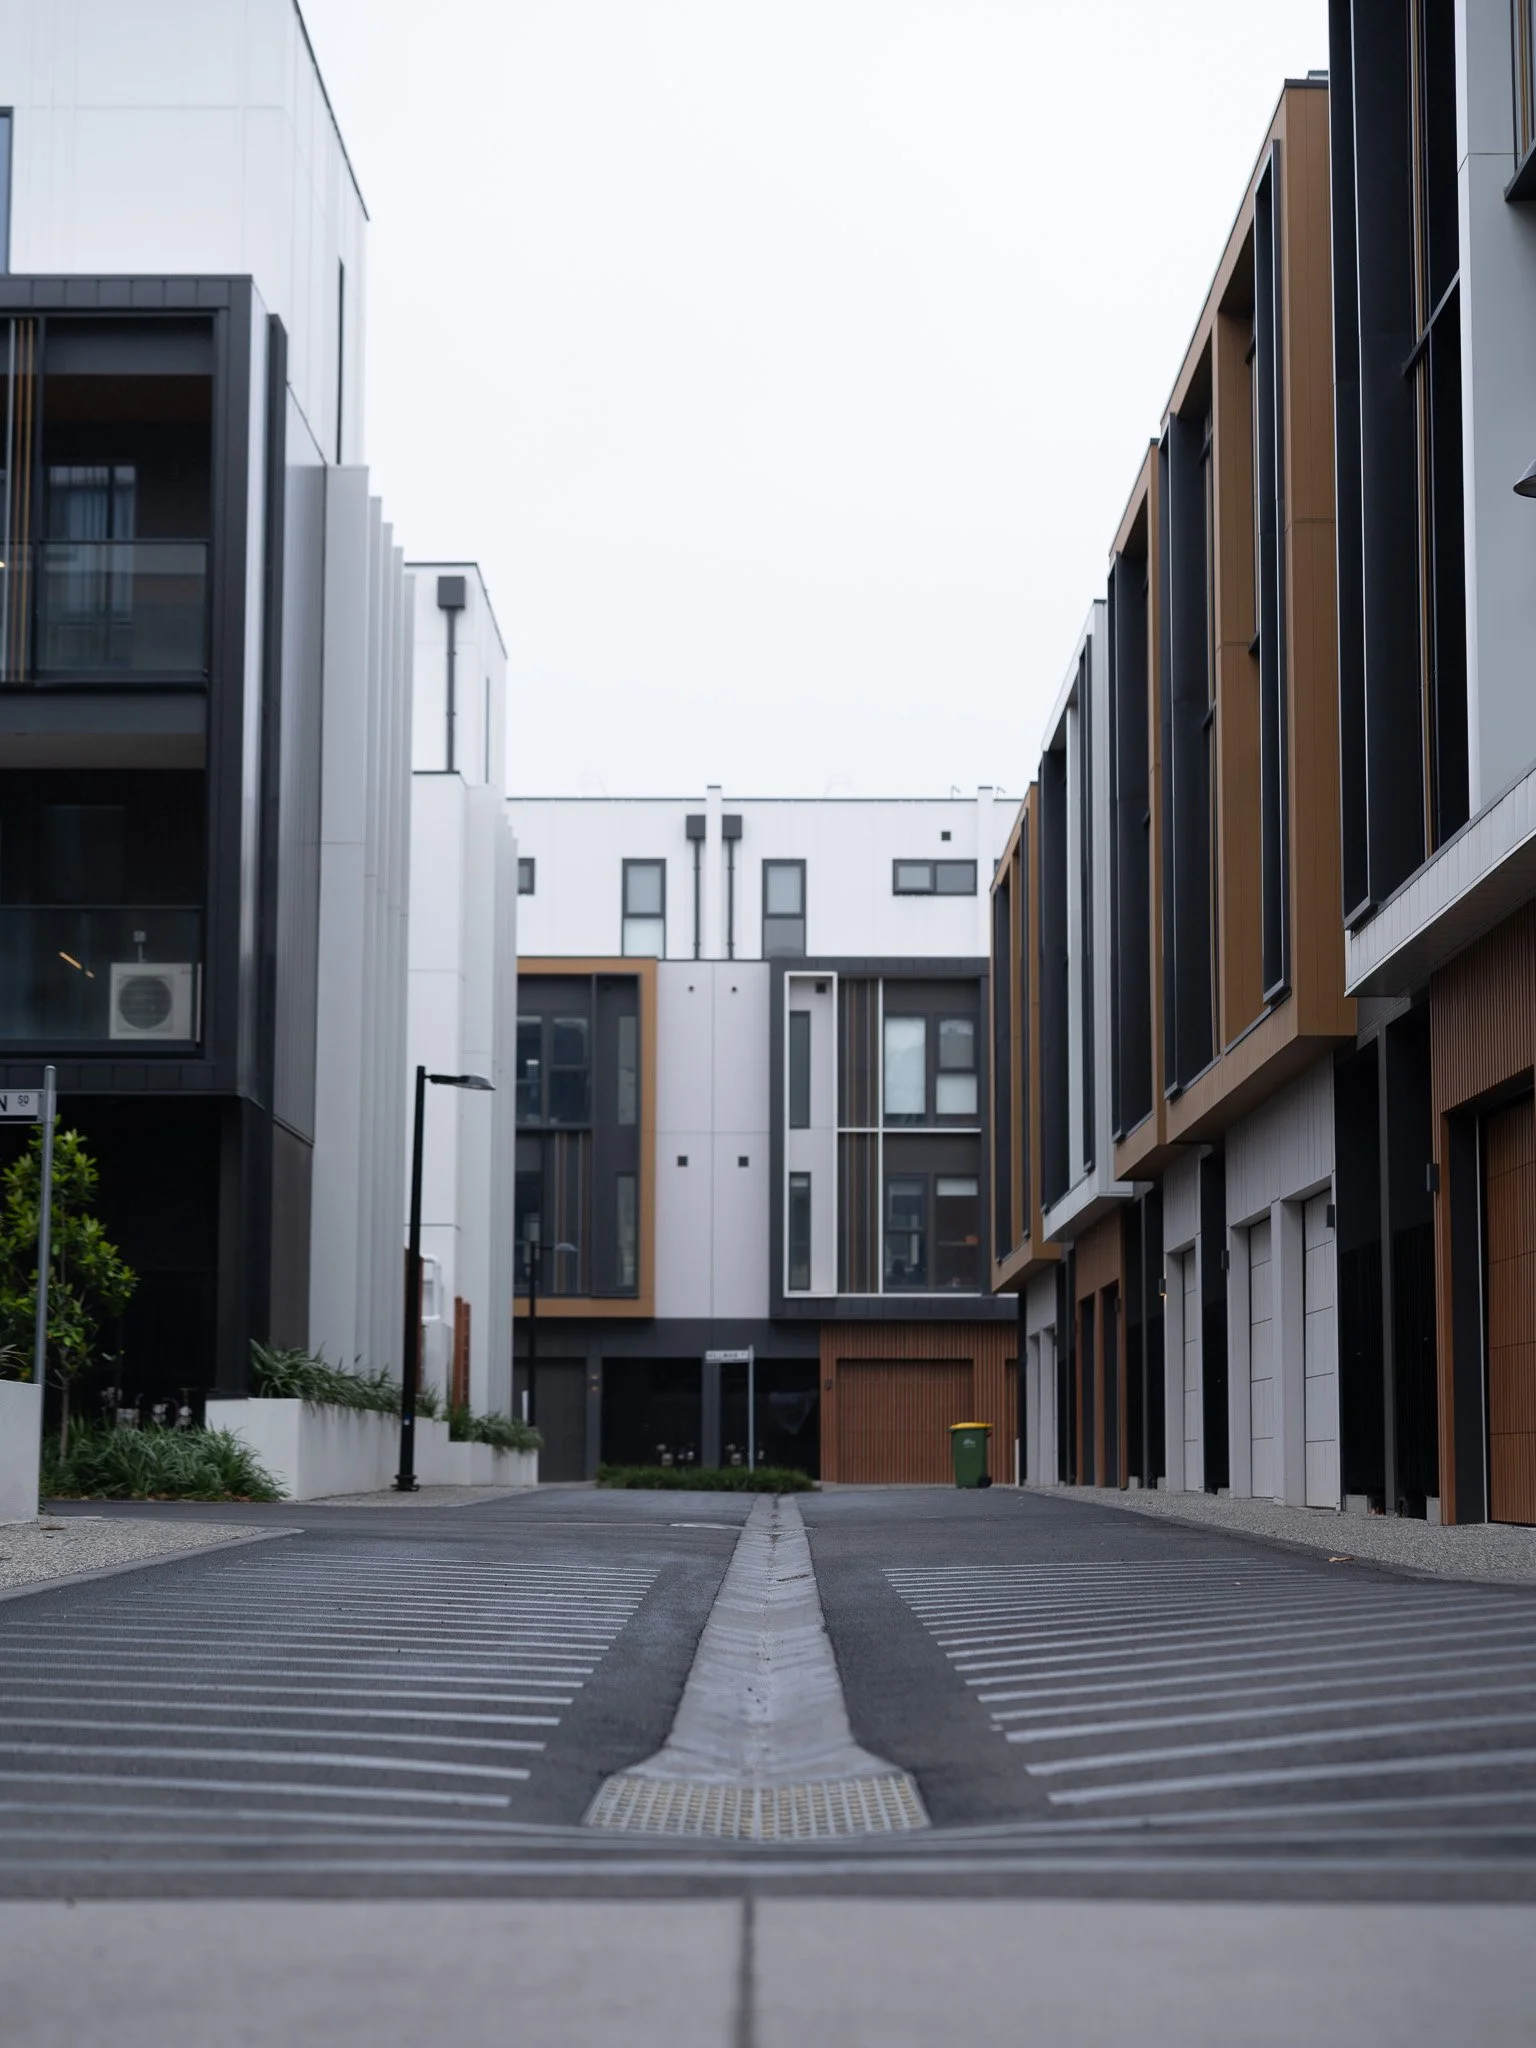
The “Clean Plate”
First, lock your focus and exposure settings. Take a photo of the scene with nothing in it. This "clean plate" serves as the background that will eventually replace the space where the support, (a milk crate in my example), currently sits.
You should now have at least two images, taken on a tripod without any movement, or changing any settings between images:
1x clean plate
1x image of your subject.
Again, the critical secret to a perfect edit is to ensure you are shooting fully manually, including white balance and focus, to maintain consistency across your composite.
Matching the Visuals
Before opening Photoshop, you need to ensure both images look identical in terms of color, tone, and texture. This happens in your RAW editor (like Lightroom or Capture One).
Develop the "Look": Pick your favourite shot—usually the one with the subject—and apply your edits. Adjust your exposure, white balance, and color grading until you achieve the desired mood.
Sync the Settings: Once you are happy with the edit, select your "clean plate" and sync or copy/paste those exact settings.
The Result: You now have two perfectly matched files. When you eventually mask out the crate, the background from the clean plate will slide under the subject layer without any jarring shifts in brightness or hue.
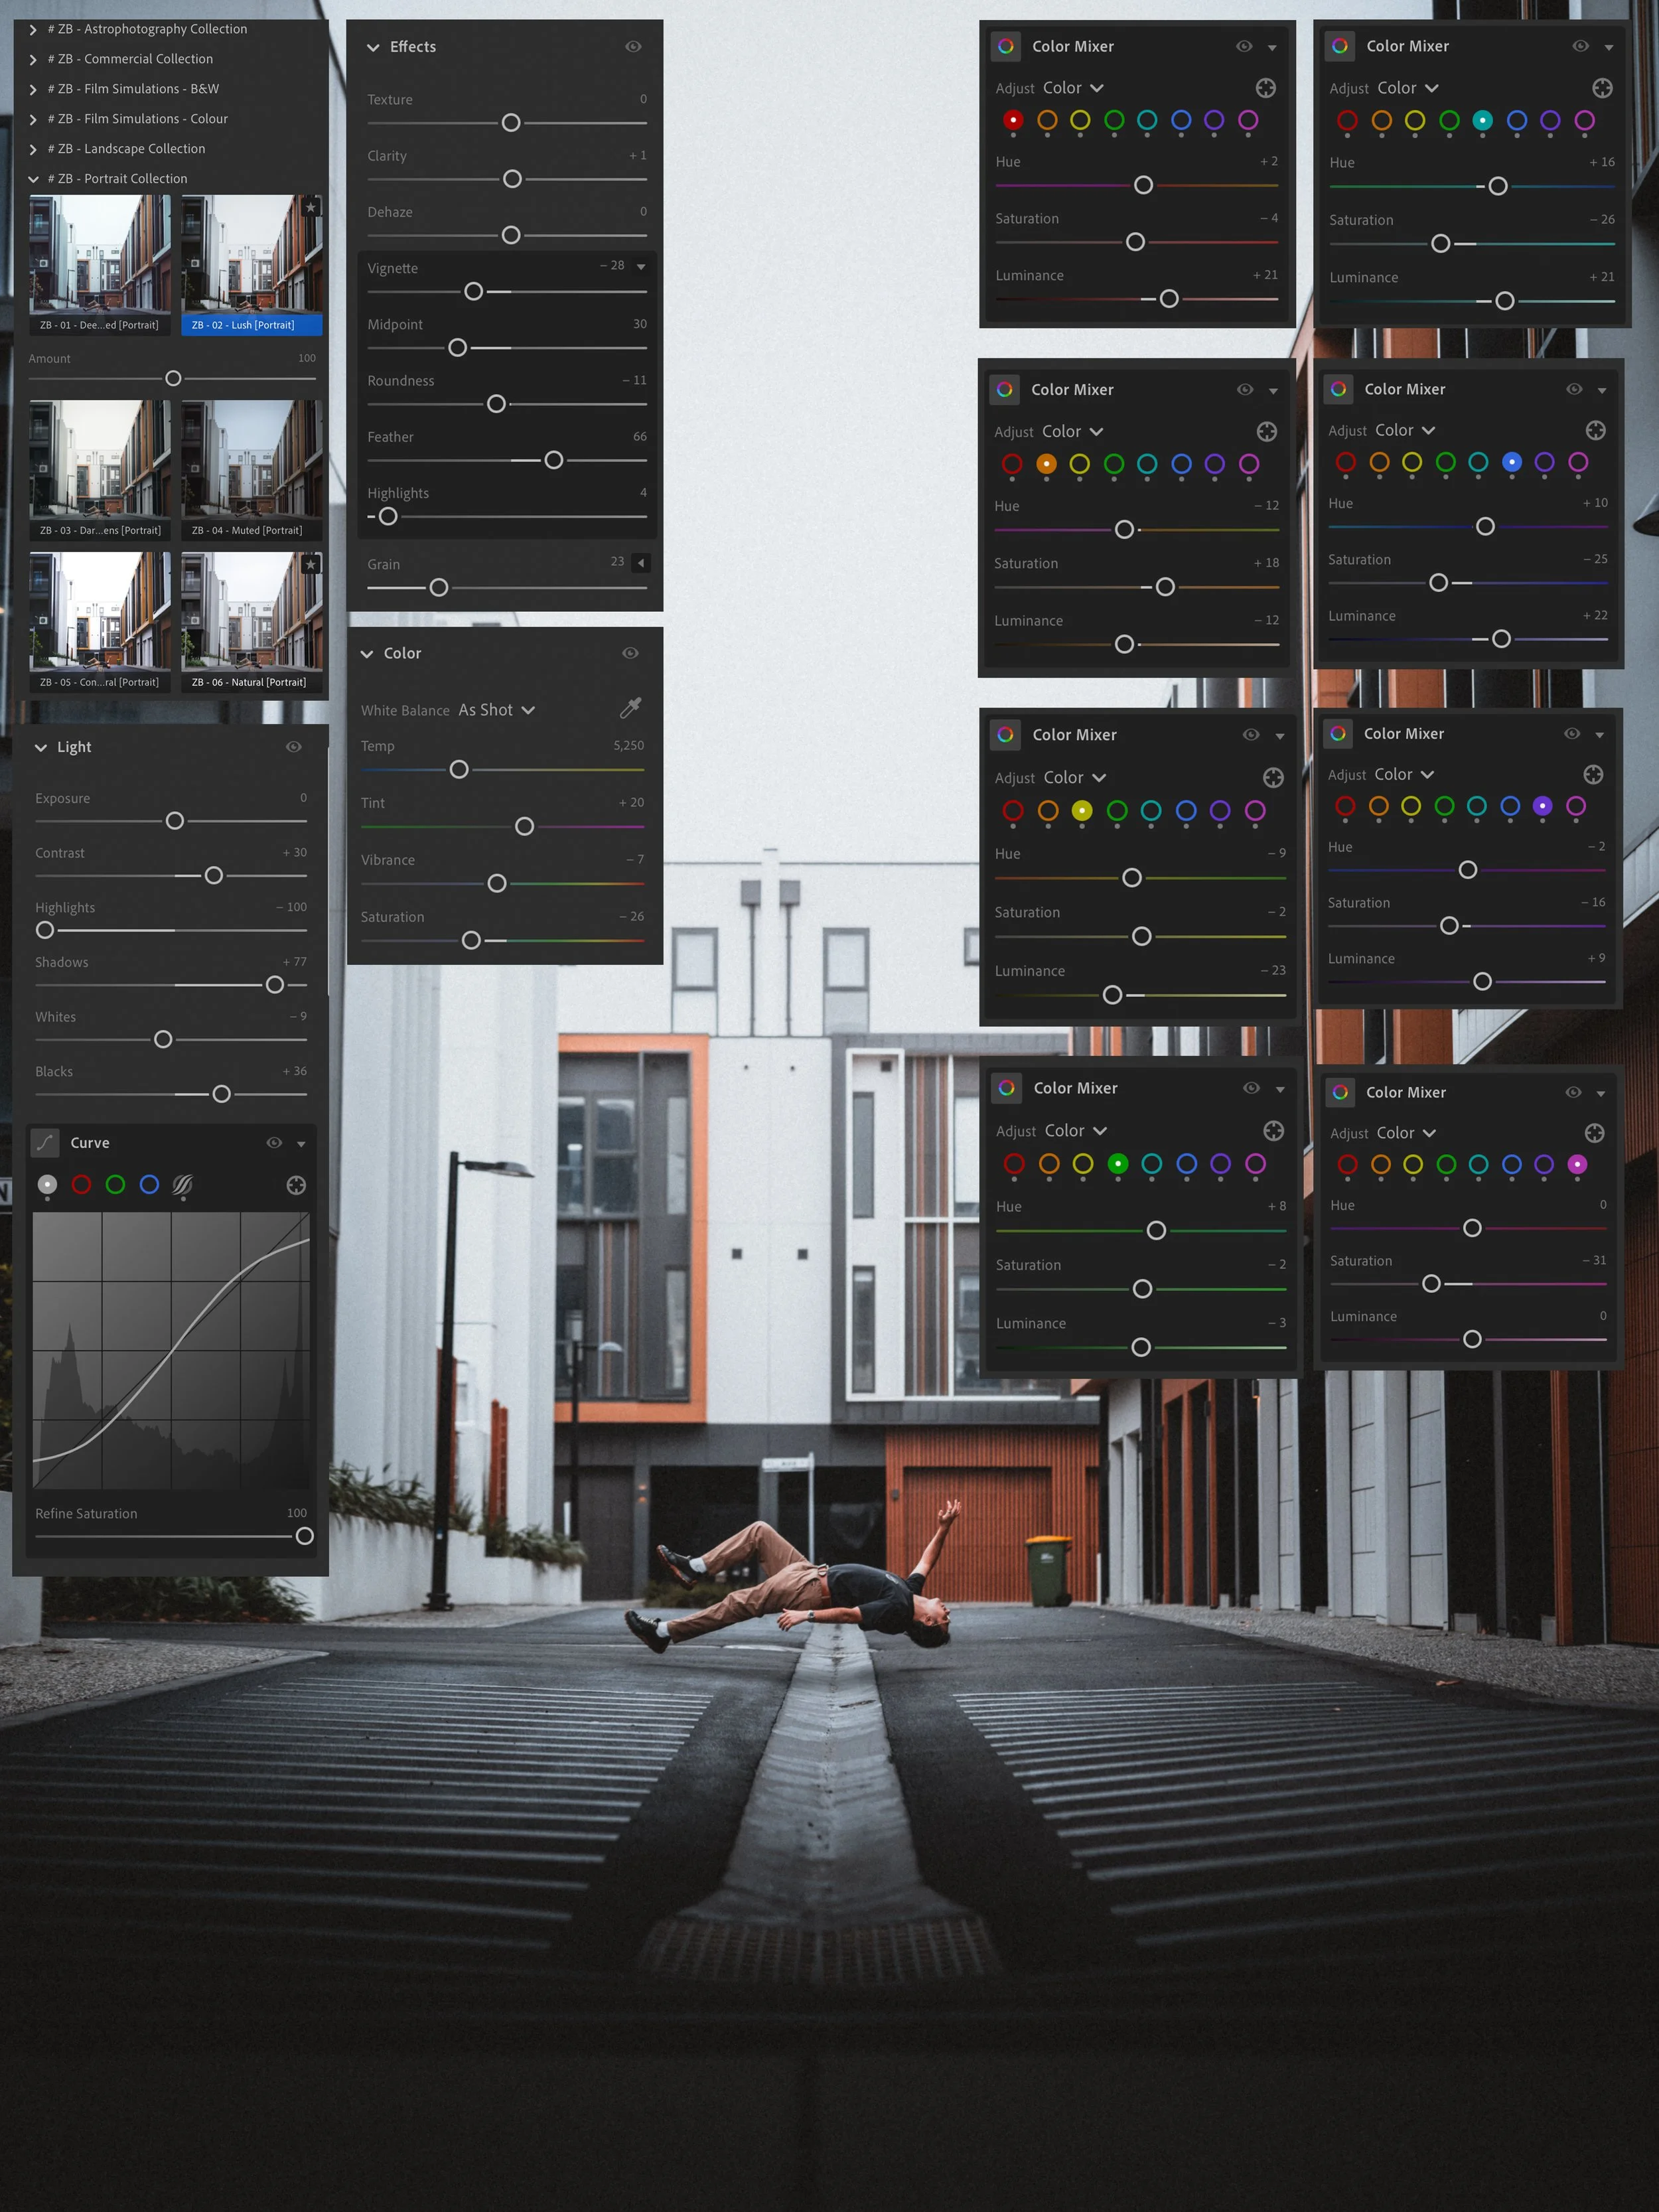
For this image, I used my “Lush” preset, available under the portrait set. Presets can be downloaded from here
Importing to Photoshop
With your images prepped and synced, it’s time to move into Photoshop for the final assembly.
Load Files into Stacks: Go to File > Scripts > Load Files into Stack. Select your two edited images.
Layer Order: Ensure the image of your subject is the Top Layer and your empty background (the clean plate) is the Bottom Layer.

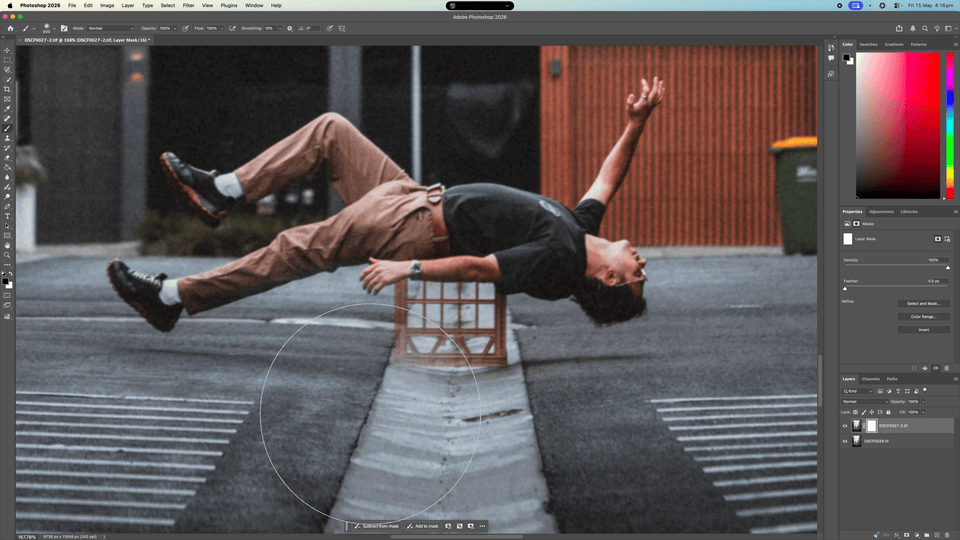
Executing the Mask
Instead of using a destructive tool like the eraser, we will use a Layer Mask.
Select your top layer and click the Add Layer Mask icon (the rectangle with a circle in the middle).
Select a Brush Tool with a "0%" hardness to ensure a soft, natural edge.
Set your foreground colour to Black.
Carefully paint over the milk crate. As you paint, the crate will disappear, revealing the clean, empty floor from the layer beneath it.
The Final Polish
Zoom in to 100% and check the edges where the subject’s body or clothes meet the areas you've masked. If you accidentally hide a part of the subject, simply switch your brush to White and paint it back in. This non-destructive workflow allows you to be precise until the illusion is perfect.
Now that you’ve seen behind the curtain, it’s time to try it yourself. You don’t need a professional studio or high-end gear to pull this off—just a tripod, a steady surface, and a bit of creativity.
Your Mission: Capture your own levitation shot using the "Milk Crate Method." It doesn't have to be a crate; a stool, a chair, or even a stack of books will work. Focus on achieving that "weightless" look by paying close attention to your subject's pose and how their clothes hang.
The Checklist:
Lock it down: Use a tripod. No exceptions!
The Clean Plate: Don’t forget to snap that empty background shot before you move your subject.
Sync your edits: Make sure both photos have the exact same color and exposure settings before you head into Photoshop.
The Reveal: Use a soft brush on your layer mask to blend the two worlds together.
Share Your Results I want to see what you create! Whether it’s a serene float or a dramatic mid-air leap, tag me in your photos! There is nothing better than seeing a concept come to life through a lens.
There is never any pressure to support me. These tutorials are free of charge, with the aim to benefit the community. If you would like to support me, feel free to purchase my presets or wallpaper pack.
Thank you!
Zachory Benton